Installing Zabbix (Server and Agent) On Ubuntu Gusty7.10
Introduction – Zabbix is a solution for monitoring applications, networks, and servers. With Zabbix you can monitor multiple servers at a time, using a Zabbix server that comes with a web interface (that is used to configure Zabbix and holds the graphs of your systems) and Zabbix agents that are installed on the systems to be monitored. The Zabbix agents deliver the desired data to the Zabbix server. This tutorial shows how you can install the Zabbix server and agent on a Ubuntu Gusty 7.10.
I will use the system SFPAZABBIX with the IP address 192.168.3.180 as the Zabbix server, and I’ll install a Zabbix agent on the same system –
The Zabbix server can store its information in a MySQL or PostgreSQL database. We use MySQL here, so we install the MySQL server and client first using apt-get –
root@ravi:~# apt-get install mysql-server mysql-client
Create a password for the MySQL user root (replace yourrootsqlpassword with the password you want to use) –
root@ravi:~# mysqladmin -u root password yourrootsqlpassword
Installing apache2 php5 for web interface –
root@ravi:~# apt-get install apache2 php5 php5-gd
Afterwards, we can install the Zabbix server, Zabbix agent, and the Zabbix web interface with a single command –
root@ravi:~# apt-get install zabbix-server-mysql zabbix-frontend-php zabbix-agent
Apt installation will be asked a few questions-
Like mysql root user password and Zabbix database password, give mysql root password there that we created already.
This should create a MySQL database called Zabbix.
Next we must edit the Zabbix agent configuration in /etc/zabbix/zabbix_agentd.conf.
Replace Server=localhost with Server=127.0.0.1 (to avoid lookup problems of localhost) and specify the hostname of the current system in the Hostname line.
root@ravi:~# vi /etc/zabbix/zabbix_agentd.conf
[…]
Server=127.0.0.1
[…]
Hostname=SFPAZABBIX
[…]
root@ravi:~#
Then we restart the Zabbix agent –
root@ravi:~# /etc/init.d/zabbix-agent restart
Finally, we must specify the password of our zabbix MySQL user in the Zabbix web interface configuration –
root@ravi:~# vi /etc/zabbix/dbconfig.php
<?php
$DB_TYPE=’MYSQL’;
$DB_SERVER=’localhost’;
$DB_DATABASE=’zabbix’;
$DB_USER=’root’;
$DB_PASSWORD=’mysqlrootpassword’;
?>
root@ravi:~#
Restart services for zabbix server & agent –
/etc/init.d/zabbix-server restart
/etc/init.d/zabbix-agent restart
That’s it. you can access Zabbix webbased admin panel check URL http://SFPAZABBIX/zabbix or http://192.168.3.180/zabbix
>
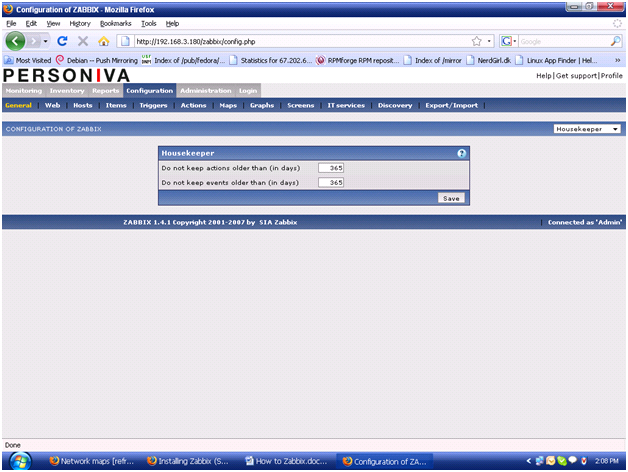
Afterwards, go to Configuration TAB and configure Zabbix!
If you have problems with Zabbix, please check the Zabbix logs – * /var/log/zabbix-agent/zabbix_agentd.log
* /var/log/zabbix-server/zabbix_server.logThe Zabbix configuration files for the server, agent, and web interface are as follows –
* /etc/zabbix/apache.conf
* /etc/zabbix/dbconfig.php
* /etc/zabbix/zabbix_agentd.conf
* /etc/zabbix/zabbix_server.conf
Taking backup of Zabbix server database using below script –
#!/bin/bash
# script for dumping the contents of a zabbix MySQL database
# this script will create a compressed mysqldump of the specified database
savePath=/zabbix/
fileName=”ZabbixDBbackup” # filename for the backup note the
dateVar=$(date +%Y-%m-%d) # date variable to append to filename
mysqldump -u root -p(mysqlpassword) zabbix | gzip > $savePath$fileName-$dateVar.gz
Schedule cronjob for Zabbix is as follows –
@daily /bin/sh /zabbix/backupforzabbix.sh #zabbix db backup daily midnight
Append existing zabbix db backup on zabbix db –
Go to where is the zabbix db backup path ( i.e. /zabbix), check date & go for newer date when zabbix was running in good condition.
(ls -l commands output give you the newer date)
Unzip the compressed file and rename it to dbfilename.sql (with sql extension)
Now go to mysql CLI prompt –
root@ravi:~# mysql -u root -p
mysql> use zabbix;
mysql> \. filename.sql
above command append the tables of zabbix database.
Thanks
Ravi Bhure
Similar Posts:
- 상위 5 – 오픈 소스 네트워크 및 성능 모니터링 + 경보 시스템
- Топ 5 – Open Network Источник и мониторинга производительности системы оповещения
- 前5名 – 开源网络和性能监控+报警系统
- トップ5 – オープンソースのネットワークおよびパフォーマンスの監視+警告システム
- शीर्ष 5 मुक्त स्रोत नेटवर्क और पर्फॉर्मेन्स की निगरानी + चेतावनी प्रणाली
- 5 อันดับ – เครือข่าย Open Source และตรวจสอบประสิทธิภาพของระบบการแจ้งเตือน
- MySQL full DB dump -shell script
2 Replies to “Installing Zabbix (Server and Agent) On Ubuntu Gusty7.10”
great post!
I currently use zabbix to monitor a really large environment (more than 320 servers)
I’ve founded a wonderful plugin that is more than a plugin and the others monitoring systems don’t have nothing of similar, and nothing that go inside oracle so deeply.
In the hope that someone found useful my comment
http://www.smartmarmot.com
here you are going to find Orabbix opensource and released under GPL3
Interesante post, hay un artículo bastante completo sobre el proceso de instalación de zabbix con oracle, creo que puede resultar de utilidad, el artículo se llama:
Instalación y Configuración de Zabbix 1.8.x – Oracle 10gR2 – OEL 5.x (CentOS 5.x – Red Hat 5.x)
y está en la url:
http://www.malagahabla.com/Blog/ViewPost.aspx?pageid=38&ItemID=63&mid=44